Summary
This article will show you how to setup email on your Windows Phone 8 powered device.
New Account Information
Open Settings
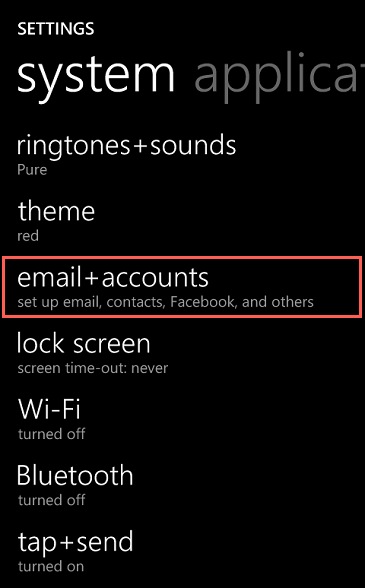
Tap email + accounts
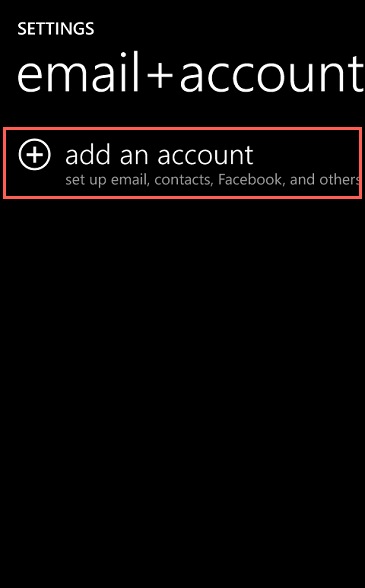
Choose add an account
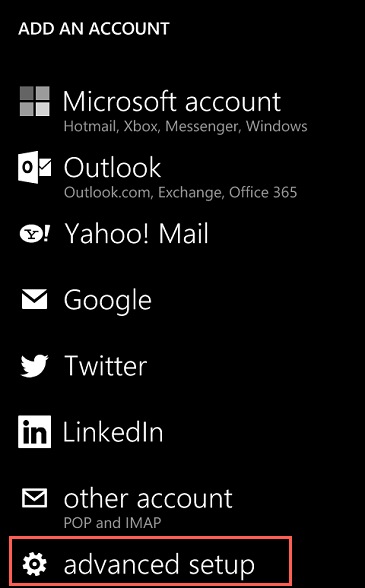
Choose advanced setup
Enter your Email address and Password
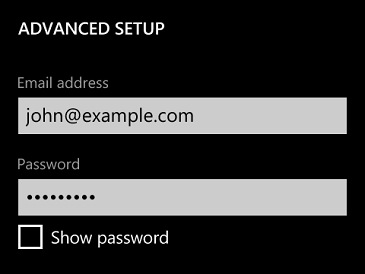
Tap Next.
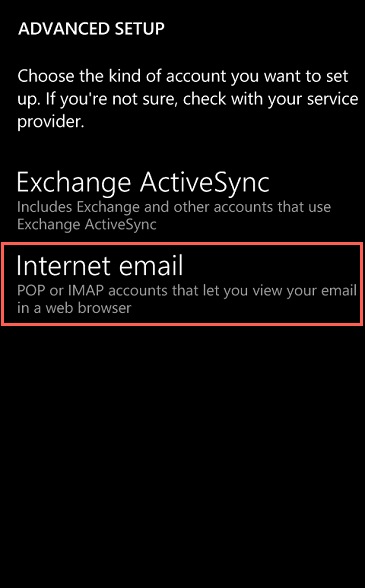
Choose Internet email
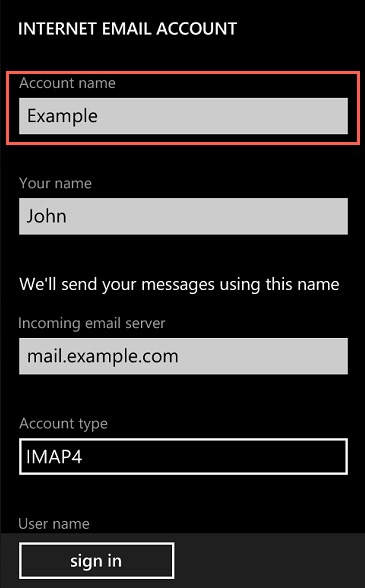
Enter an Account Name, this is how the account will be identified later.
Incoming Mail Server
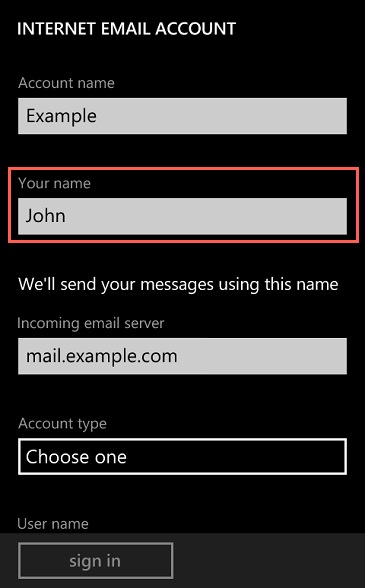
Enter Your name, as you would like it to appear in your emails.
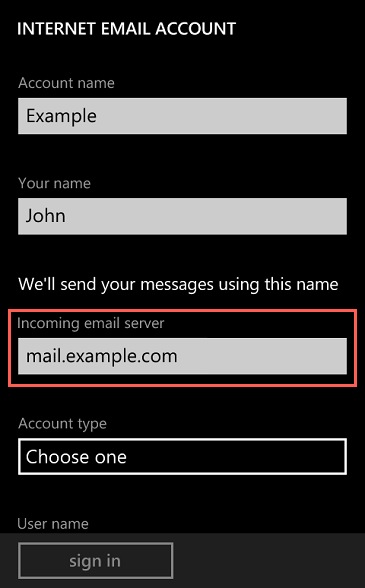
Enter mail.example.com as the Incoming email server
Choose POP3 or IMAP4 as the Account Type.
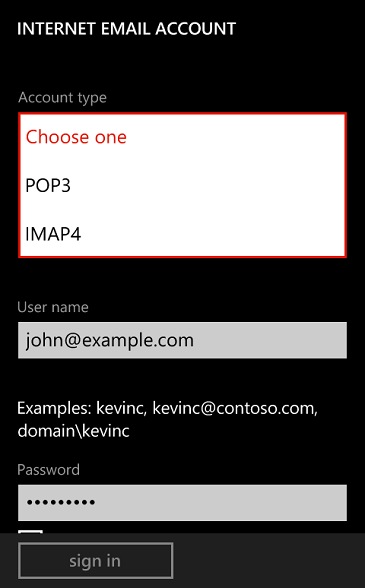
Note: IMAP is the preferred protocol as it will not download and store your emails on your Windows 8 device.
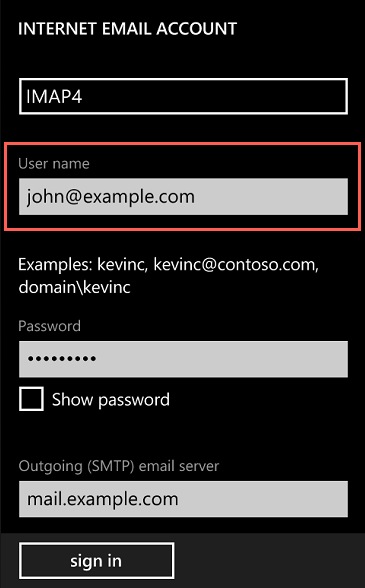
Enter your full email address as the User name
Outgoing Mail Server
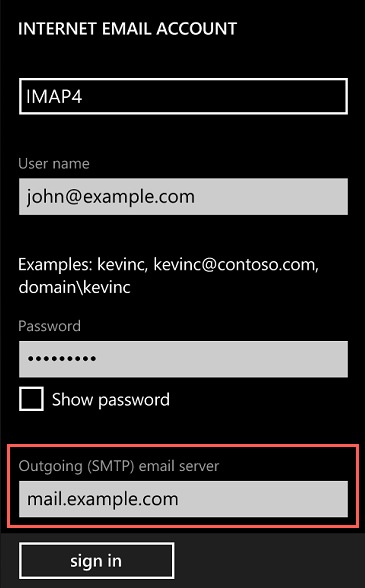
Enter mail.example.com as the Outgoing (SMTP) email server
Tap Advanced Settings
Ensure that Outgoing server requires authentication is checked.
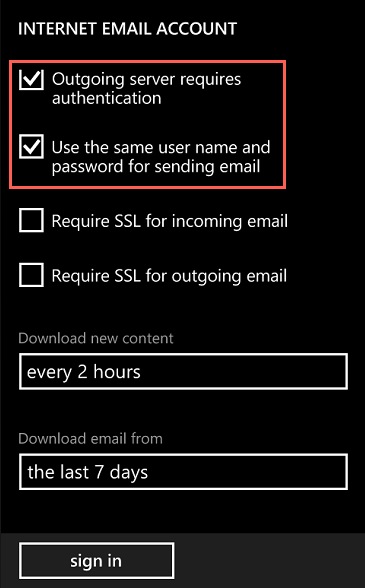
It is highly recommended but not required to use an SSL connection for email. If you'd like to use SSL for your connection to the server, check the boxes marked Require SSL for incoming email and Require SSL for outgoing email. These settings enable an SSL email certificate to encrypt the connection between your email client and the mail server.
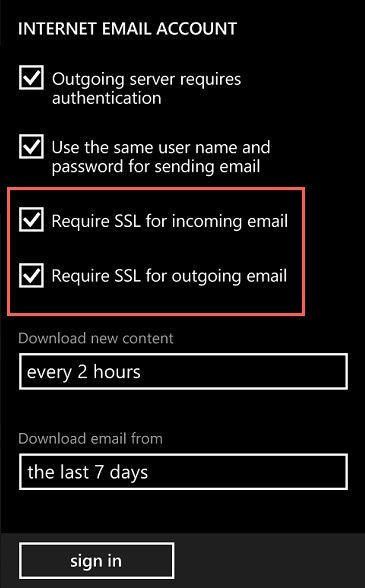
Click Sign In to save your settings
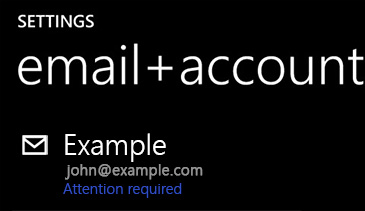
If you used SSL to connect, you will see a warning that says "Attention Required" next to the email account you just set up. Tap the email account to continue.
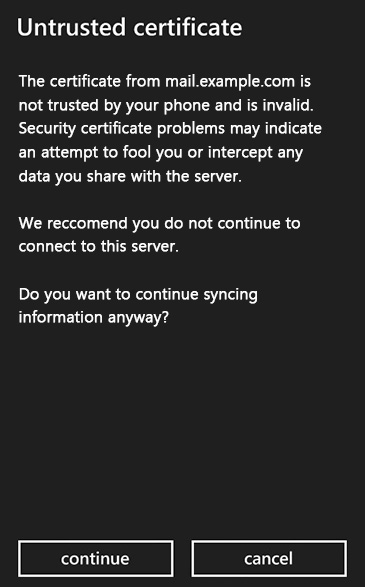
If your email application is set up using SSL and you're using your domain name as the mail server (such as mail.example.com), your Windows Phone expects the SSL certificate to contain your domain name, when it contains the name of the Just Host server (such as box123.Justhost.com) instead. Because of this mismatch, you will receive a message warning you that the name on the Just Host server's certificate doesn't match your domain name. This is normal. Just tap Continue to continue.
That's it! Enjoy using email on your Windows Phone

